From ModMyiFone - Wiki
UPDATE: Each ringtone needs its own spoof file!
Introduction
This method works on Windows and Macs with any version of iTunes. [by â⦠works â¦â I mean it should work.] Your iPhone does not need any special treatment like Jailbreak or anything. Instructions below were written using a PC, so all Mac users out there will need to tweak it a little bit to suit their OS. I based my research on a method posted by Cleverboy on MacRumors. Link (The linked method no longer works with newest versions of iTunes.)
Things you need:
iPhone 1.1.1
Any version of iTunes
iPhone access program like iPhuc, iPhoneBrowser, or an SSH client.
Step 1 - Prepare your ringtone.
Make a ringtone by using your preferred method. Very likely you will be using an MP3 file which is what this guide will assume.
This is important: Until someone else does a bit more research, make the ringtone name 7 characters. Follow this rule for the 'spoof' file too. It appears that a length of 4 characters might works as well.
Step 2 â Convert your ringtone to AAC (optional)
Note: This step is optional, however AAC is the preferred format for your ringontes. This guide will assume you follow this step, but if you don't, just treat your .mp3 file as the guide instructs you to treat the .m4a file.
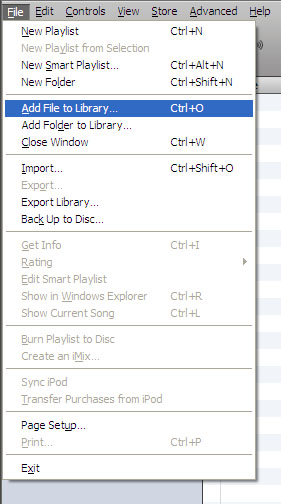
Add your ringtone to iTunes by either dragging it into your "Library" or using "File->Add File to Library" function.
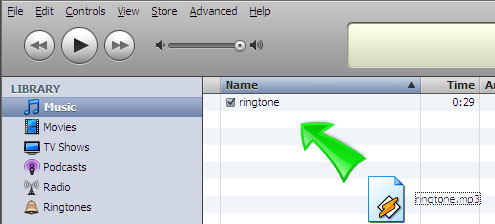
Notice how it shows up in the "Music" and no
t in the "Ringtone" section.
Letâs make sure iTunes is configured to convert to AAC. Click on "Edit->Preferences". Click on "Advanced" tab and then on "Importing" tab.
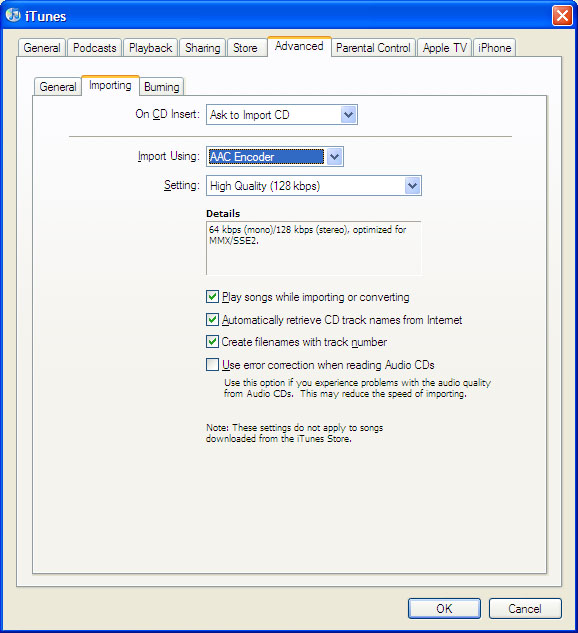
Make sure "AAC encoder" is selected. You can now close this window.
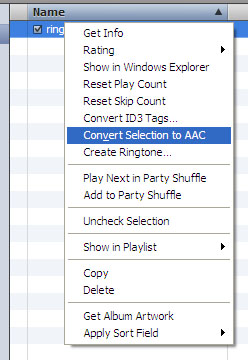
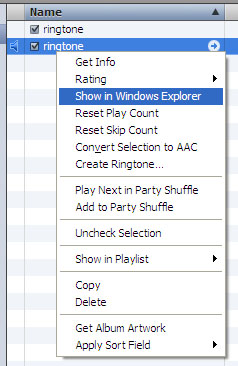
Right click on the ringtone in your library and select âConvert Selection to AACâ
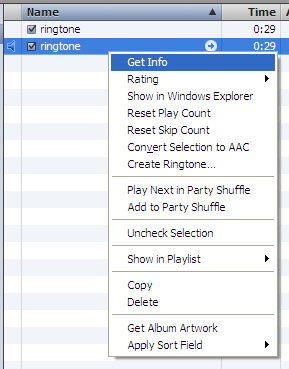
After this you will have two ringtones in your library. The newly created one is the one we will work with. Right click on it and select âGet Infoâ
Make sure it is an AAC audio file. If it says something else you clicked on wrong file.
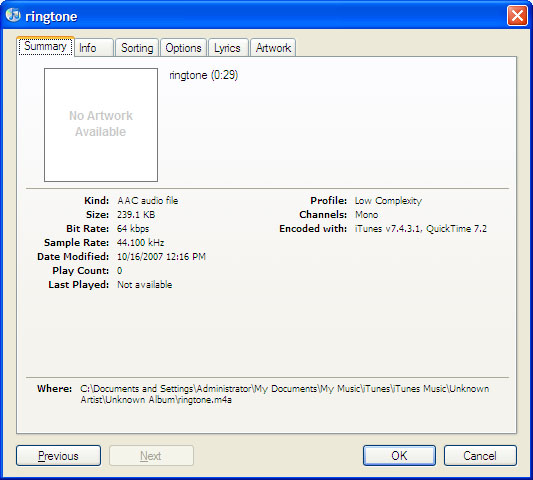
Then select "Options" tab and write down the length of the file.
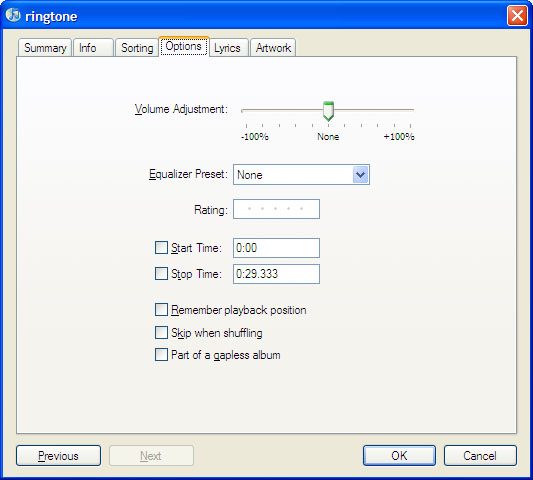
In this case it is 29.333. Make sure you have 3 digits in the last section. Sometimes iTunes will display something like 11.1 or 11.11. You just need to add zeros at the end. So 11.1 is 11.100 and 11.11 is 11.110.
Hit Ok and close that window. Right click on your ringtone again and select âShow in Windows Explorerâ. [it will probably say âShow in Finderâ for you Mac users].
You might want to copy this file somewhere else since it will be your ringtone but it is not necessary.
Step 3 â Load it on the iPhone.
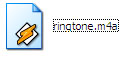
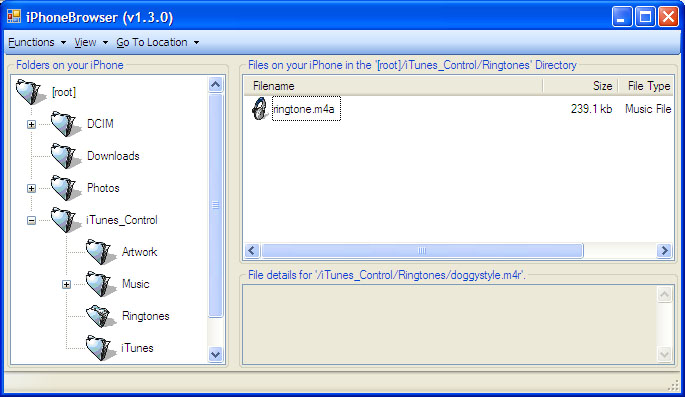
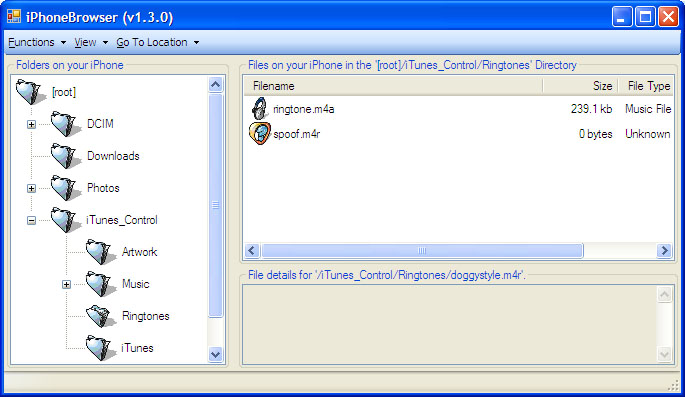
Start up your iPhone access program and connect to the iPhone. Transfer your ringtone with .m4a extension to your /iTunes_Control/Ringtones/ folder (on jailbroken phones use /private/var/root/Media/iTunes_Control/Ringtones/ instead).
Step 4 â Create a spoof
Now we need to make iPhone think that this ringtone is legit and in order to do that we need a spoof file. You can do that by right clicking anywhere on your desktop or any explorer windows and choosing "New->Text Document".

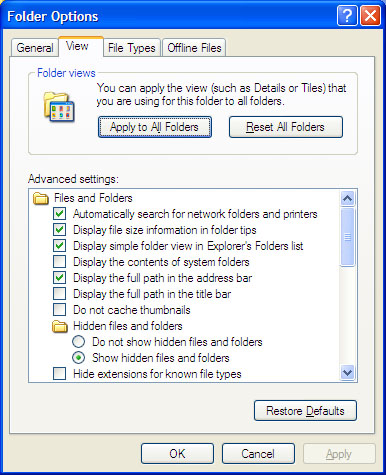
Rename it to "spoof.m4r" [if you cant see the extension you have to enable the functionality by clicking on "Tools->Folder Options->View" and unchecking âHide extensions for known file typesâ.
Then transfer the spoof file into the same place you transferred your ringtone to on the iPhone.
Each ringtone needs its own spoof file.
Step 5 â Modifying Ringtones.plist
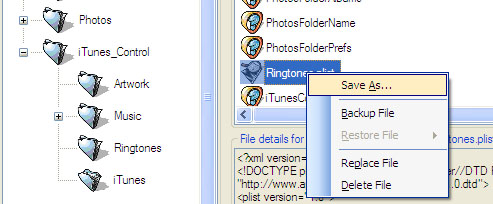
Using your iPhone access program navigate to /iTunes_Control/iTunes/ (on a jailbroken iPhone, use /private/var/root/Media/iTunes_Control/iTunes/ instead) and save "Ringtones.plist" file on your computer.
Open "Ringtones.plist" using Wordpad or any other text editor of your choice [that means you Mac users]. And make it look like the one below.
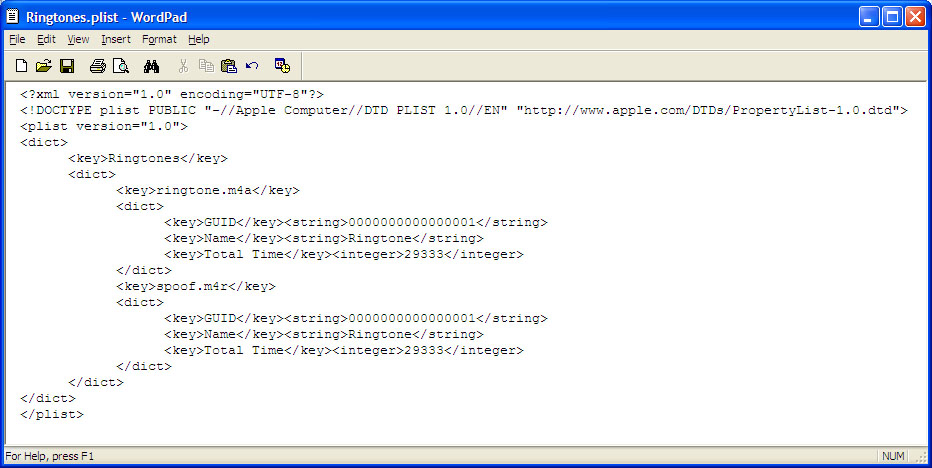
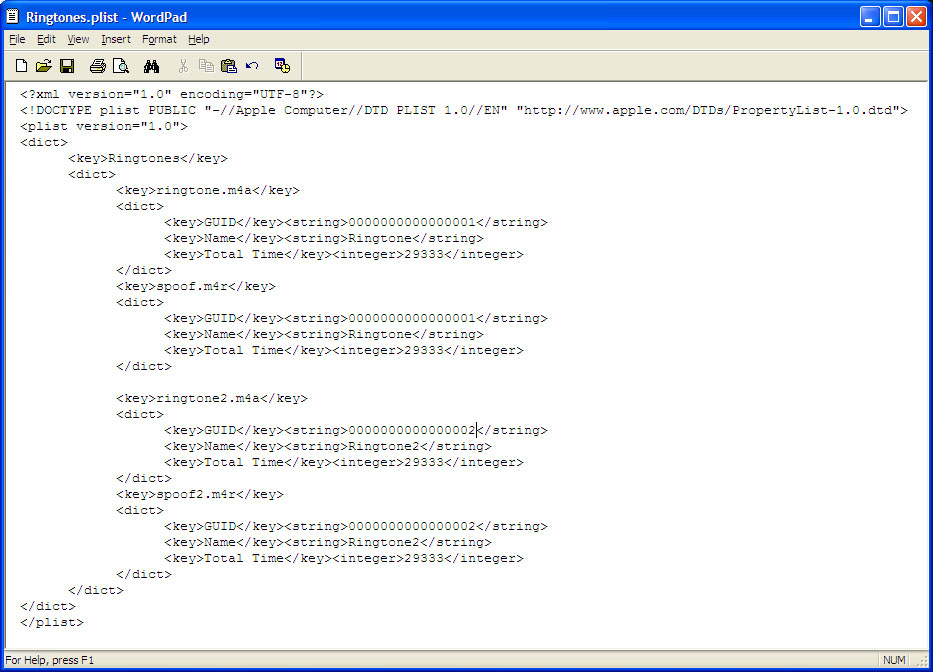
You have to understand what is going on here in order to make your own ringtones. See the two sections one for "ringtone.m4a" and the other for "spoof.m4r"? Every ringtone you create will need a double entry like that. Letâs look at the "spoof.m4r" first. You will use this entry for every single custom ringtone you make. Do you see where it says "GUID"? This code is a unique number for the ringtone. It does not matter what it is as long as it is unique [I used 1]. It has to be a hexadecimal number, if you donât know what that means just use digits. "Name" is what will show up on your iPhone in ringtone selection dialog. "Total Time" is the time you want your ringtone to play. Remember the number you have written down. It goes here. Now look at the "ringtone.m4a". Notice that "GUID", "Name", and "Total Time" are the same. It has to be that way. Next ringtone you will create will use similar entry system for example it will be something like this
Step 6 â Transfer "Ringtones.plist" to the iPhone.
You did it twice already. Just load the "Ringtones.plist" to "iTunes_Control/iTunes" and overwrite the old one.
Step 7 â Restart your phone
Ahhh. Duh. I donât know why you need to do that but you do. Go to Sounds, select your new ringtone and enjoy.
Step 8 - "Sync-Proof" your ringtones (optional)
To prevent your free custom ringtones from being swiped during an iTunes sync, follow this guide:
Prevent iTunes From Deleting Custom Ringtones on iPhone 1.1.1
Conclusion
Why does this work?
... and by "why" i mean "i think". In order to play a ringtone, iPhone has to have an AAC file. There are two kind of those. M4R are purchased ones and M4A are not. If you create a AAC file it naturally is M4A. The reason why you cant just load it on the iPhone is because it wont show M4A files in the ringtone selection dialog. You cant just rename it to M4R because then iPhone will check its DRM information and it will fail because its not there. The reason why this works is that iPhone lists our spoof file in the ringtone selection dialog but plays our M4A that has the same GUID.
ENJOY!
Look on page 4 of the discussion for a copy of a working plist file!


